- Login to your website admin areas, then click the "Posts" menu button on the left hand side menu"
- You will now see a list of all the posts that are in your website (published or in "draft" status)
- To create a new Blog post, click the "Add new post" button at the top of the screen.
- On your new blog post composing page, add a title to your post in the top box.
- Next add the body text of your website to the blog post.
- Choose a "Category" by ticking the most appropriate category from the list on the right hand column, best to choose just 1 category.
- To add photos, first position your mouse cursor in the document, where you want the image to appear, then click the "Add media" button in the box above the compose window.
- This will bring up the insert media box, you can add an image from your library in the site, or upload a new image.
- Once the image is selected or uploaded, you should select the image thumbnail from the list
- Next, choose the size and alignment of the image.
- Next, when ready to insert, click "Insert into post".
- Once you are happy with your post, you can preview how it would look on the frontend, by clicking "Preview" button in the top right.
- If you are ready to publish the post, click the publish button.
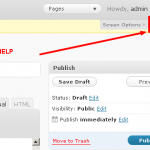
- If you want the post to publish at a later date, you can schedule the post by clicking the "Edit" button next to the "Publish Immediately" text in the Publish box up in the top right of the screen.
At first the options may seem daunting, but with use you will see why this system is preferred by millions of content publishers across the internet. If you ever come across a feature that doesn’t make sense, please try reading the help section for the particular page you are on, the help button is always in the top right of the page.If you’re still unsure please send me an email, and I will create one of these guides for you.
Your News or Blog main archive page
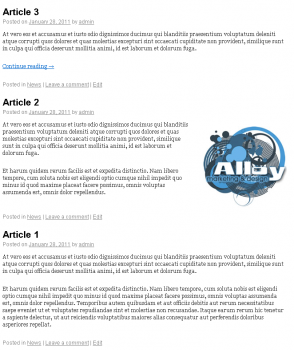
If you’re just running a blog this will be your home page. If you’re running a more conventional website, it will be the page you see when clicking ‘News’ or ‘Blog’ in your main menu. This appears as a list of all articles in your website organised chronologically with the newest article first.As you add new articles, they will appear at the top of the list, pushing the rest down. This page is great for Search Engine Optimisation purposes as it will generally be one of the largest pages on the website, with a diverse but (hopefully) related range of articles, and changing regularly as new content is published.The title of each article acts as a link to the full version of that article. By default, posts will be displayed in full on the main page. You can see Article 1 is displayed in full which is the default, Article 2 includes an image and is also displayed in full. Article 3 is making use of the “More tag” and is only displaying the first paragraph, encouraging the reader to either click the Article 3 title or the ‘Continue reading’ link.
Using the more link is a great way to display the opening sentences of a large article that may contain photos or lots of content. There is the convenience of the user being able to view all the article extracts in 1 place, then click on the article they wish to read in full. For SEO purposes it’s better to include as much text content as possible which means using the ‘More’ tag lower down in articles, or not at all.However if you wish to keep your main news page with more condensed extracts, it’s easy to insert the ‘More’ tag into each article either at the very top of the page, before any content or further down, after the content you wish to show.
Using the More tag
When editing a post or page, you will see the More tag button on the toolbar above the text area. When clicked the more tag will be inserted wherever the cursor is positioned in the document. If you just want to display the News Article titles on the main page, insert the tag at the top of the page before you write the content. Otherwise position the more tag where you want the article to be truncated.
How to limit the number of articles displayed on the main news page
To stop your main news / blog page becoming an endless scrolling page with hundreds of articles (which would be good for SEO but not so good for users) You can specify a limit to the number of pages shown, with older articles spilling onto a second page accessed by an ‘Older articles’ link at the bottom of the page. Please email if you need this limit put in place.


