
Basics
- Access your e-commerce website by visiting: www.yourwebsiteaddress.co.uk/login
Managing orders
Viewing orders
When you start taking orders the order management page will begin to fill up. You can view these orders by going to Shop > Orders in the left hand admin menu.
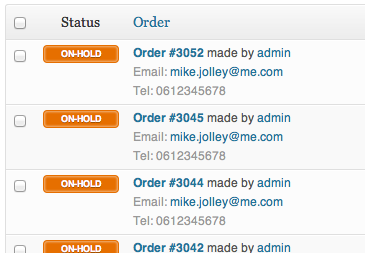
Each order row displays useful details such as the customers address, their email, telephone number, and the order status. You can click on the orders number or the ‘view order’ button to see the single order page (this is also where you can edit the order details and update the status).The order statuses let you know how far along the order is, starting from pending and ending with complete. The following order statuses are used:
- Pending – Order received (unpaid)
- Failed – Payment failed or was declined (unpaid)
- Processing – Payment received and stock has been reduced- the order is awaiting fulfilment
- Completed – Order fulfilled and complete – requires not further action
- On-Hold – Awaiting payment – stock is reduced, but you need to confirm payment
- Cancelled – Cancelled by an admin or the customer – no further action required
- Refunded – Refunded by an admin – no further action required
Tips
You can filter the list of displayed orders by date, status and customer by using the form at the top of the screen:

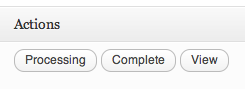
Order rows also have some handy shortcut buttons for marking orders complete and processing, should you want to do so quickly:
Editing/viewing single orders
From the single order page not only can you view all order data, you can edit and update it. You can:
- Change the order status
- Edit order items – modify the product, prices, and taxes
- Stock – Reduce and restore stock for an order
- Invoice – Emails the customer order details and a payment link – very handy if manually creating an order for somebody from within your webshop – and especially useful if you are using your webshop’s built in inventory/stock control and low stock alerts system.
Order Data
The order data panel lets you modify the order status, view (or change) the customers order note, and change which user the order is assigned to.

On the right of the order data panel you’ll find the customers billing and shipping addresses. To edit the addresses click ‘edit’ and a form will be revealed. Once saved, the new address will be displayed, in a localised format.
Order Items
The next panel on the order page is the order items panel. This panel lists items which are in the order, as well as quantities and prices.
The editable parts of line items include:
- Tax Class – Tax class for the line. This may be adjusted if, for example, the customer is tax exempt.
- Quantity – The quantity of the item the user is purchasing
- Line Subtotal – Line price and line tax before pre-tax discounts
- Line Total – Line price and line tax after pre-tax discounts
There are two buttons available on this panel – calc line tax and calc totals. Calculating line tax will use your prices, and calculate the tax based on the customers shipping address. If the customer’s address has not been input, it will default to the stores base location.Calculating the totals will fill in certain parts in the order totals panel.
Order Totals
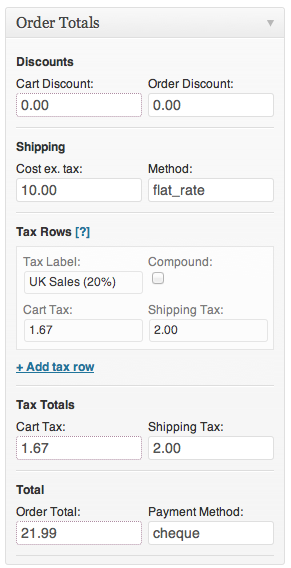
The order totals panel stores totals and tax for the order. You can enter these values yourself or have them part calculated for you using the ‘calc totals’ button. The totals comprise of the following:
- Cart Discount – pre-tax discounts. Can be auto-calculated.
- Order Discount – post-tax discounts. Need to be input manually.
- Shipping cost – cost excluding tax.
- Shipping method – name of the method.
- Cart tax – cart tax total.
- Shipping tax – shipping tax total.
- Order total
- Payment method – name of the payment method used.
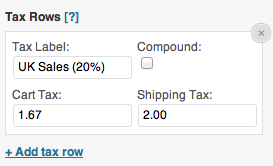
There is also a section called tax rows. This is where you can define (and name) multiple tax rows. This is useful if, for example, you take multiple taxes or use compound taxes. These values are displayed on the customer invoice.
Adding an order manually
Add an order using the ‘Add New’ link at the top of the orders page. Once added you can input the customer details, add line items, and calculate the totals. You should set a relevant status for the new order – if it needs to be paid use ‘pending’.After saving, you can use the ‘Email Invoice’ link to email the customer the order details and a payment link. Simple!
Order/Customer Notes
The ‘Order Notes’ panel displays notes attached to the order. These are used for storing event details, such as payment gateway “callback” results or reducing stock levels, and for adding notes to the order for customers to view. Some payment gateways also add notes for debugging.
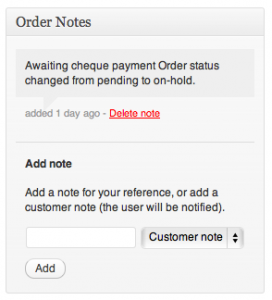
Using notes to communicate with customers
The notes feature can be a very powerful tool for communicating with customers. Need to add a tracking number for shipping? Some stock is delayed? Add a customer note and they will be automatically notified.When added, customer notes are highlighted in purple. Customers receive notes via email, but can view them by viewing an order, or using the Shop order tracking page. Alternatively you could make a note “Private” so only you can read the note.
